Multi-arch Docker building and Deployment
(A note primarily for rocket dev and testing)
Overview
This page describes how to perform these actions:
- building a Docker image (including compiling) for a target robot machine architecture (e.g.
arm64for RPi4) from host computers that may or may not have the same architecture (e.g. on anamd64laptop) - transferring the built Docker image to the target robot
The main potential improvements from doing so are:
- A clean separation of development environment, i.e. dependency installation, version control, building, all happen on PCs; And only packaged images are deployed on the robot;
- In case of
arm64host devices, like Apple Silicon Mac's, the host's stronger computation power could be taken advantage of (e.g. building) - (minor) Currently, the wireless network in Technopark (2024.03) does not have Internet access. So in case of missing dependency, rebuilding the docker image would require some network setup changes for the robot, and is tedious. With above actions, the robot doesn't really require Internet.
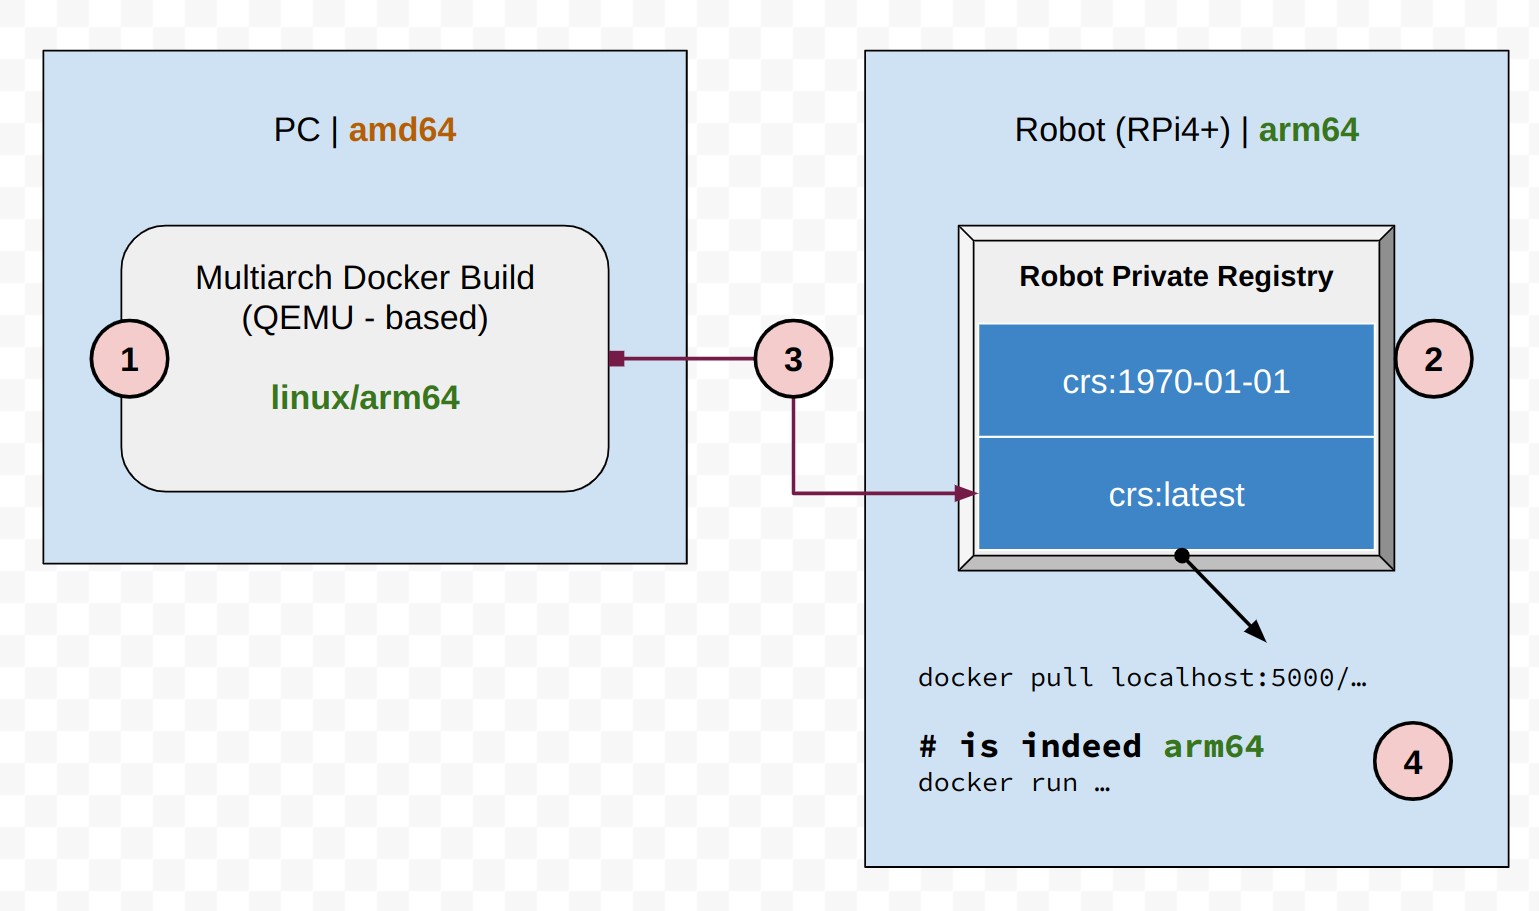
Here is a simple diagram illustration.
How-To's
(The step numbers correspond to the circled numbers in the image above)
Step 1: Building multi-arch Docker images
- on host, follow the QEMU setup
- E.g. without Docker Desktop, run:
docker run --privileged --rm tonistiigi/binfmt --install all
- E.g. without Docker Desktop, run:
-
Make sure a
buildxbuilder with correct platforms exist -
Build the image from a Dockerfile and current working directory as the context (for CRS use, extra work is still needed)
Ref: https://www.docker.com/blog/multi-arch-images/
Step 2: Setting up the private docker registry on robot and a web-GUI (needed once)
- Create a directory where a
docker-compose.ymlfile and persistent storage for the registry could be stored - Save the following contents to the
docker-compose.yml
version: '3.8'

services:
  registry-ui:
    image: joxit/docker-registry-ui:main
    restart: always
    ports:
      - 8090:80
    environment:
      - SINGLE_REGISTRY=true
      - REGISTRY_TITLE=Private Registry
      - DELETE_IMAGES=true
      - SHOW_CONTENT_DIGEST=true
      - NGINX_PROXY_PASS_URL=http://registry-server:5000
      - SHOW_CATALOG_NB_TAGS=true
      - CATALOG_MIN_BRANCHES=1
      - CATALOG_MAX_BRANCHES=1
      - TAGLIST_PAGE_SIZE=100
      - REGISTRY_SECURED=false
      - CATALOG_ELEMENTS_LIMIT=1000
    container_name: registry-ui

  registry-server:
    image: registry:2.8.2
    restart: always
    environment:
      REGISTRY_HTTP_HEADERS_Access-Control-Allow-Origin: '[]'
      REGISTRY_HTTP_HEADERS_Access-Control-Allow-Methods: '[HEAD,GET,OPTIONS,DELETE]'
      REGISTRY_HTTP_HEADERS_Access-Control-Allow-Credentials: '[true]'
      REGISTRY_HTTP_HEADERS_Access-Control-Allow-Headers: '[Authorization,Accept,Cache-Control]'
      REGISTRY_HTTP_HEADERS_Access-Control-Expose-Headers: '[Docker-Content-Digest]'
      REGISTRY_STORAGE_DELETE_ENABLED: 'true'
    volumes:
      - ./registry/data:/var/lib/registry
    container_name: registry-server
    ports:
      - 5000:5000
- start the services:
docker compose up -d
This should spin-up the private registry container, and the web-gui container to check this registry. The web-gui could be accessed on http://[IP_OF_THE_ROBOT]:8090/, or on the robot directly at http://localhost:8090/
Ref: https://github.com/Joxit/docker-registry-ui
Step 3: push the image from host to the robot's private registry
Foreword: it's possible to transfer the docker image via commands like:
# export image to compressed file
docker save ...
# send to other machines, e.g. via network
rsync ...
# load compressed file to a docker image (on robot)
docker load ...
But it doesn't use layer and hash mechanisms of docker images, and would introduce a lot of duplicate data copying. That is why it might be worth setting up a private registry and use the push/pull methods for transferring local images.
-
Enable robot private registry over
http- In the docker daemon configuration file, allow our registry by inserting the following contents:
- Restart the docker daemon: ref, e.g. on Linux -
sudo systemctl restart docker - Try tagging the previously built
arm64image and push it to the private registry
docker tag example-image [ROBOT_IP]:5000/getting-started:latest
docker push [ROBOT_IP]:5000/getting-started:latest
- Then refresh the web-GUI that was setup in the previous step, and the new docker image should appear. Also you can click on the entry to verify the build time, hash, architecture, etc.

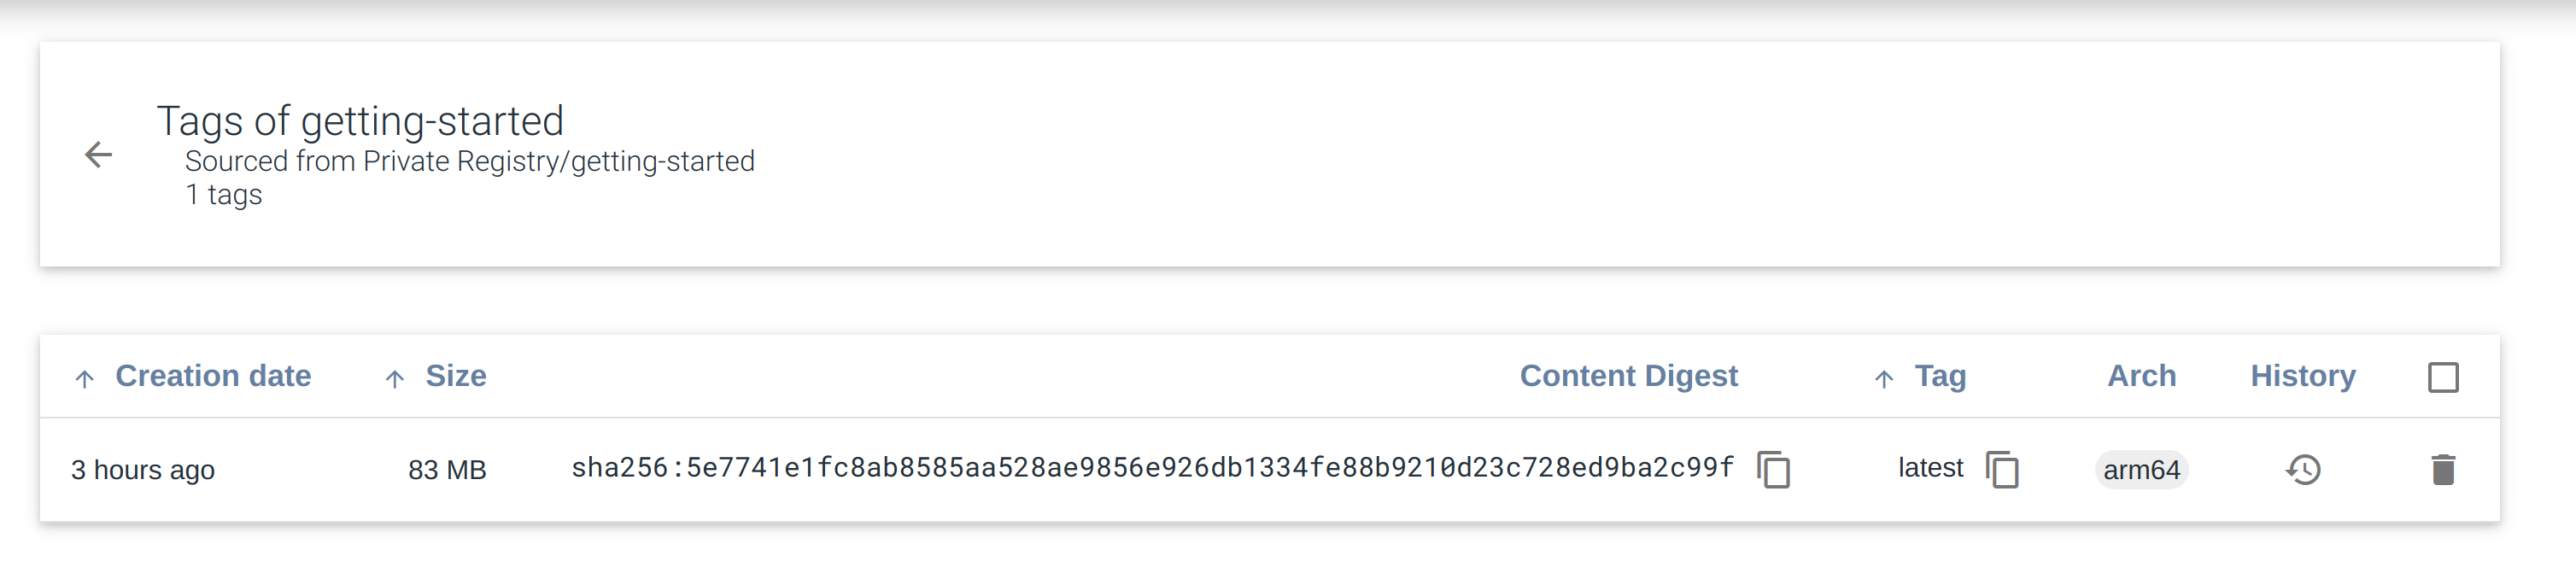
The demo host machine is of amd64 architecture, and the web-GUI shows the docker image built and pushed to the robot's registry is of arm64.
Step 4: using the image on the robot
The image now exists in the Registry only, and needs to be pulled to be able to be used as a normal image. You could think of this as loading the compressed layers on the robot drive.